RemoteIoT VPC network with Raspberry Pi offers a powerful solution for those looking to connect devices remotely without incurring high costs. This technology opens up a world of possibilities for hobbyists, students, and professionals alike. By leveraging free tools and resources, you can build your own remote IoT infrastructure.
In today's hyper-connected world, Internet of Things (IoT) devices are becoming increasingly popular. However, setting up a secure and reliable remote connection for these devices can be daunting. Fortunately, with Raspberry Pi and its compatibility with various platforms, creating a robust remote IoT network has never been easier.
This comprehensive guide will walk you through the process of setting up a remote IoT VPC network using Raspberry Pi, completely free of charge. We'll cover everything from the basics to advanced configurations, ensuring that you have all the tools and knowledge needed to succeed.
Read also:Discover The Irresistible Charm Of Marcellos Pizza A Slice Of Italian Heaven
Table of Contents
- Introduction to RemoteIoT VPC Network
- Understanding Raspberry Pi
- Benefits of Using Raspberry Pi for RemoteIoT
- Setting Up the Raspberry Pi
- Building a VPC Network
- Ensuring Network Security
- Free Tools for RemoteIoT
- Troubleshooting Common Issues
- Case Studies and Real-World Applications
- Conclusion
Introduction to RemoteIoT VPC Network
RemoteIoT VPC network is a virtual private cloud solution designed to connect IoT devices securely over the internet. This setup allows users to access and manage their devices from anywhere in the world, ensuring seamless communication between devices and users. By utilizing Raspberry Pi as the central hub, you can create a cost-effective and scalable IoT infrastructure.
One of the key advantages of this approach is the ability to use free and open-source tools, reducing the overall cost of implementation. Additionally, Raspberry Pi's versatility makes it an ideal choice for both beginners and experienced developers looking to experiment with IoT technologies.
As we delve deeper into this guide, you'll learn how to configure your Raspberry Pi for remote IoT applications, set up a VPC network, and implement best practices for security and performance.
Understanding Raspberry Pi
Raspberry Pi is a series of small single-board computers developed by the Raspberry Pi Foundation. These devices are known for their affordability, versatility, and ease of use, making them a popular choice for educational purposes, hobby projects, and even professional applications.
When it comes to remote IoT applications, Raspberry Pi offers several advantages:
- Compact size and low power consumption
- Wide range of supported operating systems and software
- Large community and extensive documentation
- Compatibility with various sensors and peripherals
By leveraging these features, you can build a robust remote IoT VPC network that meets your specific needs.
Read also:Who Is Catriona Unveiling The Life And Achievements Of A Global Icon
Benefits of Using Raspberry Pi for RemoteIoT
Using Raspberry Pi for remote IoT applications provides numerous benefits, including:
- Cost-Effectiveness: Raspberry Pi is significantly cheaper than many other single-board computers, making it an attractive option for budget-conscious users.
- Flexibility: With support for multiple operating systems and programming languages, Raspberry Pi can be customized to suit a wide variety of IoT projects.
- Community Support: The Raspberry Pi community is vast and active, offering countless tutorials, forums, and resources to help you succeed.
- Scalability: Whether you're working on a small-scale project or planning for enterprise-level deployment, Raspberry Pi can grow with your needs.
These advantages make Raspberry Pi an ideal platform for developing and deploying remote IoT VPC networks.
Setting Up the Raspberry Pi
Required Hardware
Before you begin setting up your Raspberry Pi for remote IoT applications, ensure you have the following hardware components:
- Raspberry Pi board (any model with Ethernet or Wi-Fi capabilities)
- MicroSD card (minimum 16GB)
- Power supply (official Raspberry Pi power adapter recommended)
- Keyboard and mouse (optional if using remote access)
- HDMI monitor (optional if using GUI)
Having the right hardware ensures a smooth setup process and reliable operation of your remote IoT VPC network.
Software Installation
Once you have the necessary hardware, follow these steps to install the required software:
- Download the latest version of Raspberry Pi OS from the official website.
- Use a tool like BalenaEtcher to flash the OS image onto your MicroSD card.
- Insert the MicroSD card into your Raspberry Pi and power it on.
- Connect to your local network via Ethernet or Wi-Fi.
- Update the system using the following command:
sudo apt update && sudo apt upgrade.
With the software installed and updated, you're ready to proceed to the next steps.
Building a VPC Network
A Virtual Private Cloud (VPC) network allows you to create a secure and isolated environment for your IoT devices. By configuring a VPC network on your Raspberry Pi, you can ensure that your devices communicate only with authorized endpoints, reducing the risk of unauthorized access.
To set up a VPC network:
- Install and configure a lightweight web server like Nginx or Apache.
- Set up a reverse proxy to route traffic to your IoT devices.
- Implement firewall rules to restrict access to specific IP addresses or ports.
These steps will help you create a secure and efficient VPC network for your remote IoT applications.
Ensuring Network Security
Security is paramount when working with remote IoT VPC networks. To protect your devices and data, consider implementing the following best practices:
- Use strong and unique passwords for all accounts.
- Enable two-factor authentication (2FA) wherever possible.
- Regularly update your software and firmware to patch vulnerabilities.
- Monitor network traffic for suspicious activity using tools like Wireshark or tcpdump.
By prioritizing security, you can safeguard your remote IoT VPC network against potential threats.
Free Tools for RemoteIoT
There are several free tools available that can enhance your remote IoT VPC network experience. Some of these include:
- MQTT Broker: A lightweight messaging protocol ideal for IoT applications.
- Node-RED: A visual programming tool for wiring together hardware devices, APIs, and online services.
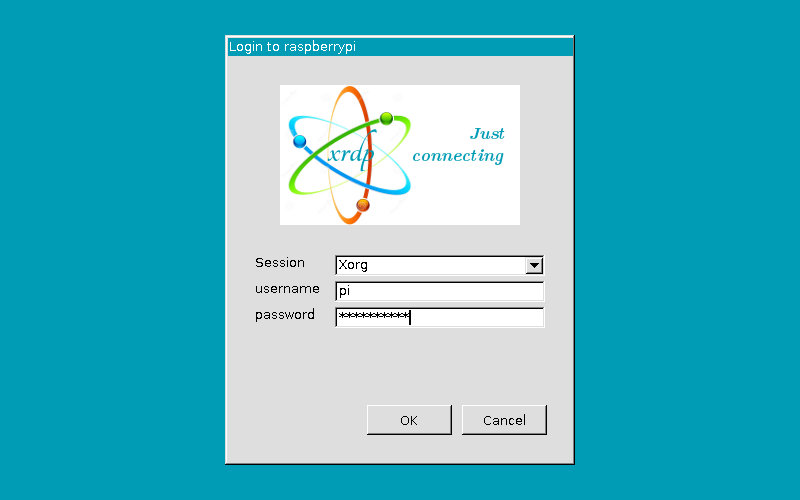
- SSH: Secure Shell for remote access to your Raspberry Pi.
- WireGuard: A modern VPN solution for secure communication.
These tools, combined with Raspberry Pi's capabilities, provide a powerful platform for remote IoT development.
Troubleshooting Common Issues
As with any technology, you may encounter issues while setting up your remote IoT VPC network. Some common problems and their solutions include:
- Connection Issues: Ensure your Raspberry Pi is connected to the correct network and that all cables are properly connected.
- Software Errors: Check your logs for error messages and consult the official Raspberry Pi documentation for troubleshooting tips.
- Performance Bottlenecks: Optimize your code and reduce unnecessary processes to improve performance.
By addressing these issues promptly, you can ensure a smooth and reliable remote IoT VPC network.
Case Studies and Real-World Applications
Remote IoT VPC networks powered by Raspberry Pi have been successfully deployed in various industries, including:
- Smart Agriculture: Monitoring soil moisture levels and automating irrigation systems.
- Home Automation: Controlling lighting, heating, and security systems remotely.
- Healthcare: Monitoring patient vitals and transmitting data to healthcare providers.
These real-world applications demonstrate the versatility and potential of remote IoT VPC networks built with Raspberry Pi.
Conclusion
In conclusion, setting up a remote IoT VPC network with Raspberry Pi is a cost-effective and powerful solution for connecting devices securely over the internet. By following the steps outlined in this guide, you can create a robust and scalable IoT infrastructure tailored to your specific needs.
We encourage you to share your experiences, ask questions, or suggest improvements in the comments section below. Additionally, feel free to explore other articles on our site for more insights into IoT technologies and their applications.